Steampunk/Loli Style Hat Tutorial

|
Tutorial by: Jillian Ryan
Geek Girl Jillian Ryan made this handy & detailed tutorial on how to craft your own Steampunk/Loli style hat...
|
Well hey there fellow cosplayers , gamers and comic book lovers! If you guys are like me you will find that sometimes feeding your hobbies can make you pretty strapped for cash. Enter cosplaying on a budget!
You know the feeling when you see the most amazing cosplay at some convention and you say, �Holy crap, I bet that was so expensive� I wish I could afford to do that�� Well my cosplay blog is focused on not making your wallet cry, therefore allowing you to have the cosplay pieces you want AND satisfy your other nerdy addictions!
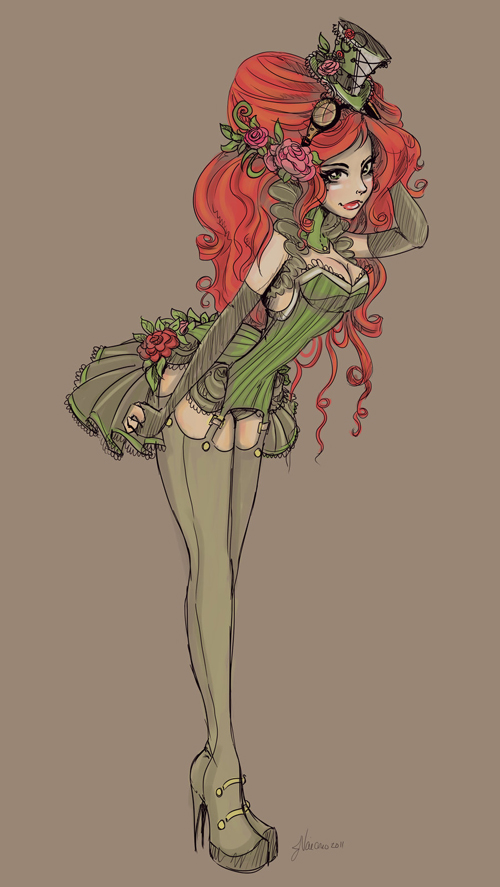
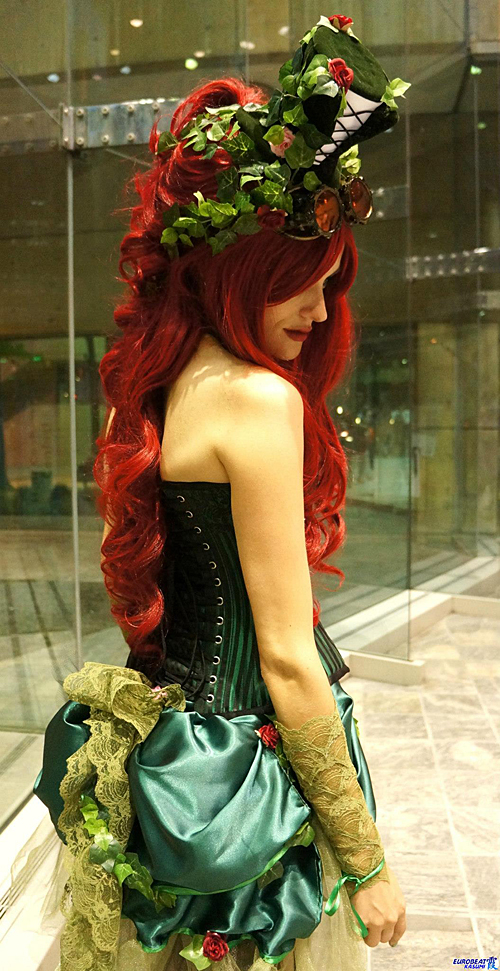
I cosplayed a steampunk version of Poison Ivy from Batman at Otakon 2012. A friend pointed out
NoFlutter's art to me and I fell in love. Like many of you, I just didn�t have the money to buy all the cool accessories and pieces that are required for this particular cosplay! Instead of scrapping the whole idea, I got crafty. I began with her cute steampunk/loli style hat, and I�ve created a step-by-step procedure for you guys to make your own hat at home!!! (Mind you, this hat will look like �the cosplay piece only a mother could love� for a little while; just stick with it and you will end up with your very own loli/steampunk hat!) Let�s begin, shall we???
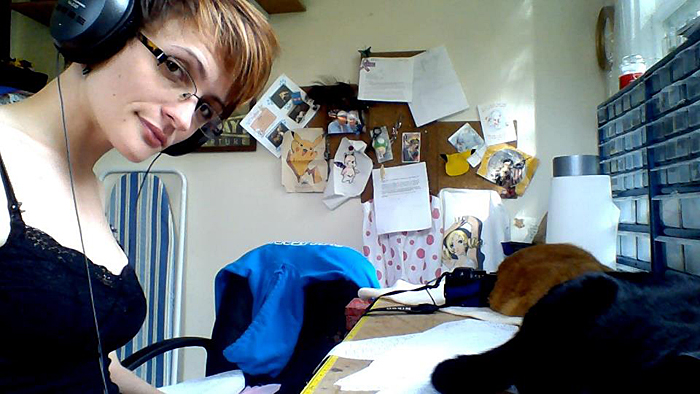
Step 1 � Grab your reference photos and keep them handy!!!
I prefer to use my computer so I won�t lose my photos � I�m really good at that. This way you can zoom in and out on the image to get a good look at the details.
 Step 2
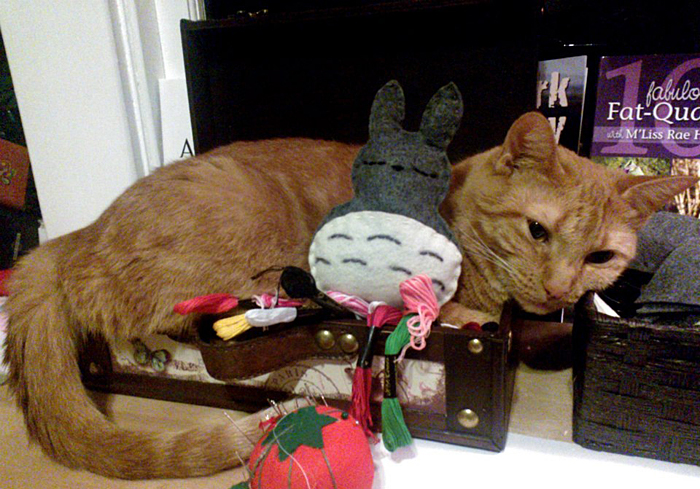
 � Have a silent partner you can vent to and get wordless pity from when you accidentally burn yourself with your glue gun.
 Step 3
 � Gather your materials!! I made multiple trips to different craft stores to find just the right pieces. Michaels and Hobby Lobby seemed to have the best selection and decent sales/coupons.
Material list:
(You probably have most of these things if you already cosplay, but I�ll give you guys a full rundown.)
� 3 or 4 plastic needlework canvases (typically found near crochet supplies)
� A pack of circular plastic needlework canvases
� Mini Glue gun
� 2 bags of mini glue sticks
� Black marker
� Sharp, small-nosed scissors
� Pliers with wire cutters and a craft hole puncher
� 1 yard of fancy lacy black ribbon
� 1 roll of craft wire � medium thickness (This stuff will last you a long time. To make sure you get the right kind, test bend the wire. It should give you a bit of resistance, just enough to hold a solid form without tons of strain. If you go too thin, it won�t hold a bend.)
� 1 roll of black decorative cord (for the laces up the hat)
� 1/2 yard of white fabric (I chose a matte white for this project. I also made sure it was a little bit thicker so you couldn�t see the green through it.)
� 1 yard of green fabric
� 1 yard of a cushion material (I went straight up to the craft counter and asked them for the material that bra cups are made out of. They had a few different types and I chose the one that had a decent price tag ($6.00 a yard) and had a bit of a squish to it while still not being �poofy.�)
� Sewing machine, white thread/bobbin, straight
� Long garland of fake ivy
� Multiple stems of fake pink and red mini roses
� Various decorative stuff!! (This is where you can get creative with your hat and make it your own! I chose clockwork pieces from the scrapbooking section at my local craft store.)
Do you have all of your items? Well let�s start making this hat!!!
(I also suggest some great music while you�re crafting. Helps keep me in the zone! I�ve found that I need my music or even sometimes favorite show when I work on cosplay.)
 Step 4
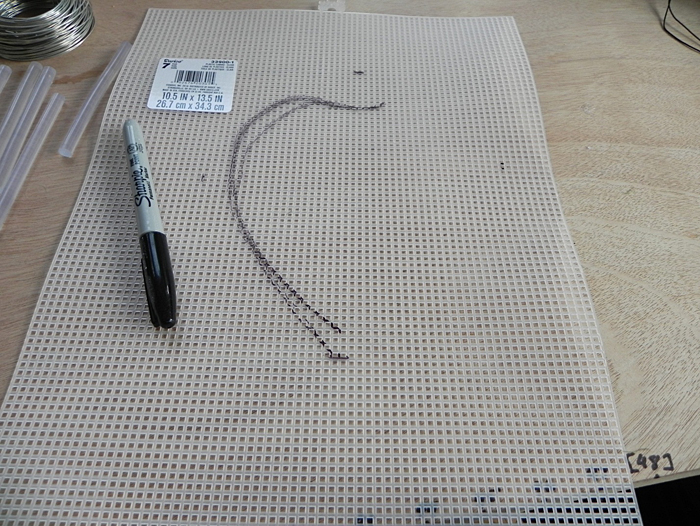
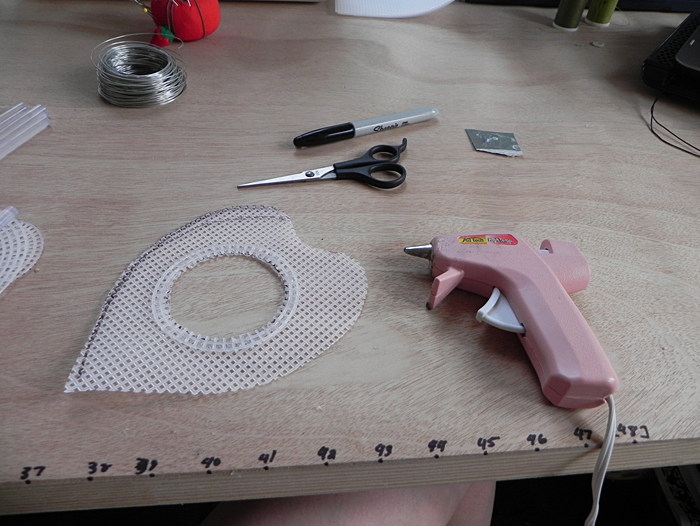
 � Draw an outline of an ivy leaf on one of your plastic sheets. This will be the base of your hat! You can hold the sheet up to your head to make sure you don�t draw it too big or too small. You can see by my AWESOME line work that I had to retrace a few times.
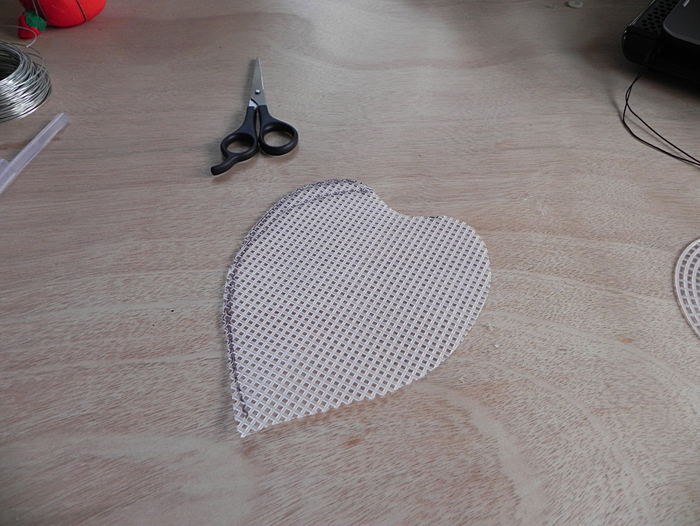
 Step 5
 � Cut out your ivy shape! (yes it looks like some kind of deformed heart but this moth will turn into a beautiful butterfly, we just have to get there!) Remember this is the base of your hat.
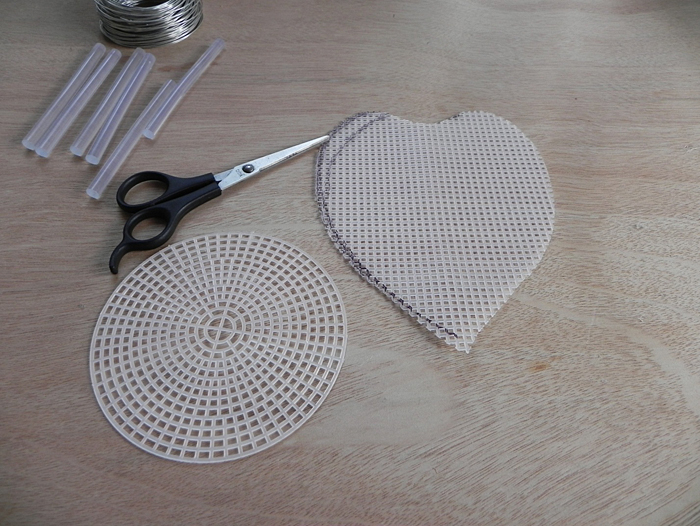
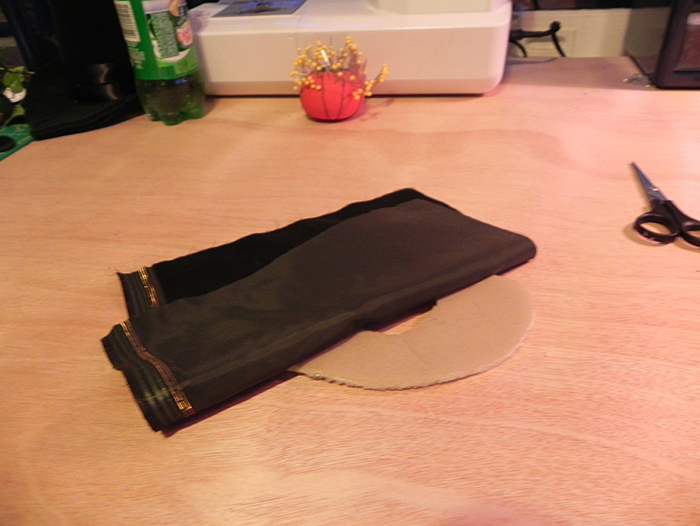
 Step 6
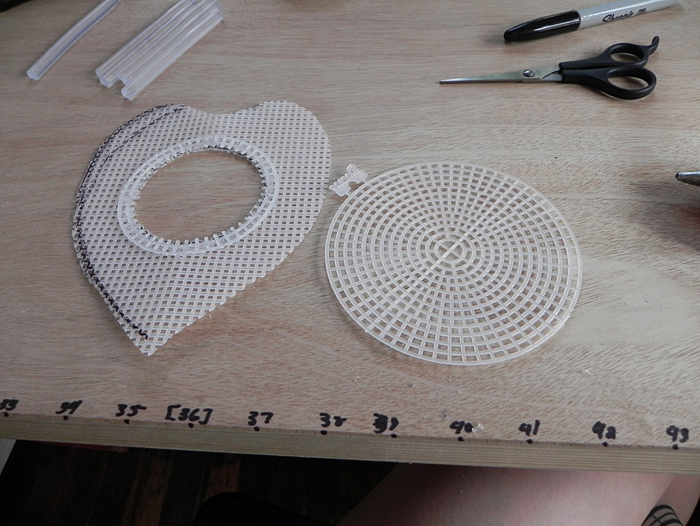
 � Grab one of your plastic circles. This photo kind of gives you an idea of how big I made the ivy base in comparison to the circle.
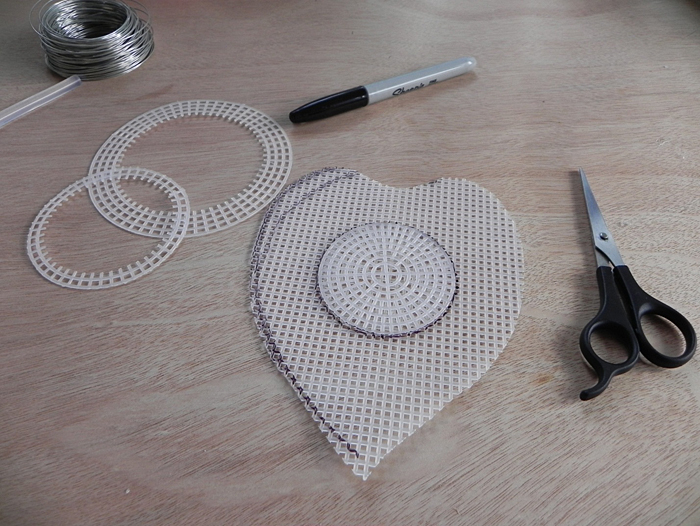
 Step 7
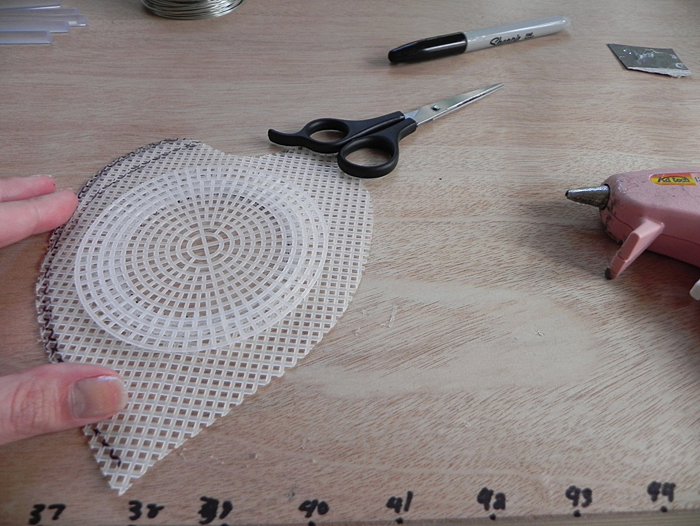
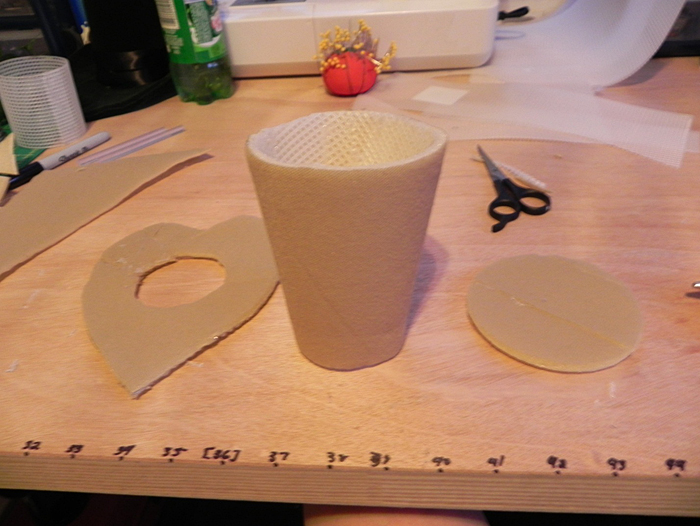
 � Trim your circle down little bit by little bit until you have a circle small enough to fit comfortably in the middle of the ivy base. Keep the cut off pieces! We will be using these soon. Trace the small circle in the middle of the base.
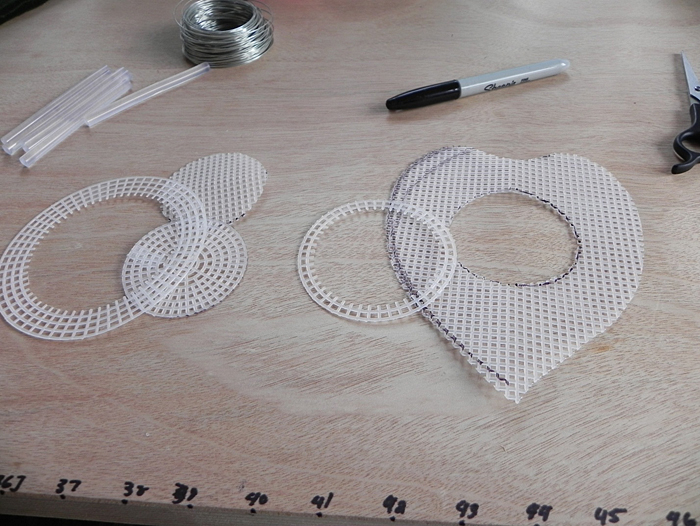
 Step 8
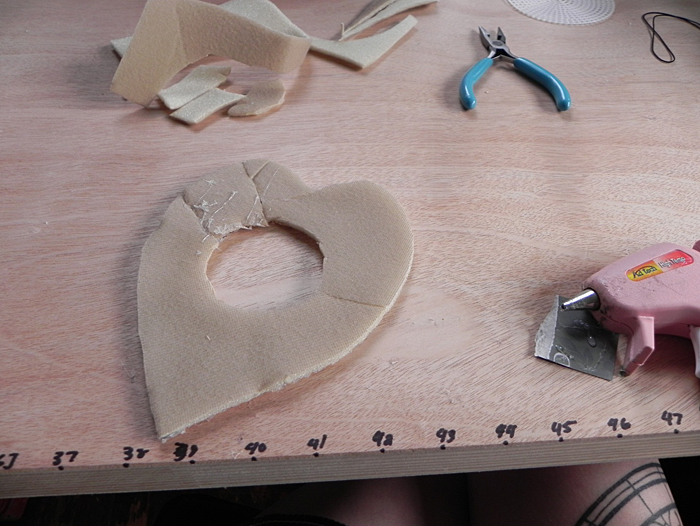
 � Cut out the circle you just traced. On the left you can see all the scraps that I have from that one circle. Keeping them in circles is important because we are about to use some of our scraps!
 Step 9
 � Take the large outer scrap from your circle and glue it around the area you just cut out. This I will act as a reinforcement for the base of the hat and make it a stronger support for the other pieces.
 Step 10
 � Grab another circle. This will be the top of your adorable hat! Notice it is much bigger than it should be. Typically the loli style hats have a petite teacup top. We will take care of that!
 Step 11
 � Trim the new circle down until it�s a moderately smaller than the base. This photo will show you about the approximate size in comparison to the ivy base. Then set your top aside, we will come back to this later.
 Step 12
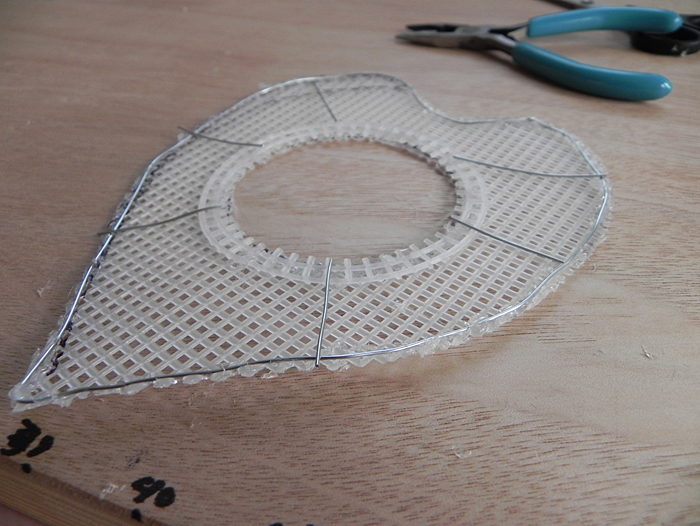
 � Using craft wire to adds support to the base and add the ability to bend it later (Like tipping the sides up to give the base some great angles!) You�ll want to glue your wire all the way around the rim of the base.
 Step 13
 � We reinforced the outer edges of the base but the middle is still way too flimsy. Clip and glue pieces of your wire as supports for the base. This will allow us to keep a nice bend around the brim. Clip off any extra that hangs off the sides � you don�t want it to be poking out of the material later.
 Step 14
 � Now we need to make it more �squishy� and have it start to take on the feel of an actual hat, not just some plastic and metal frame. With the side that has all the wire glued to it facing UP , glue the foam to the WIRE COVERED side of your base. (This creates a smoother overall appearance.)
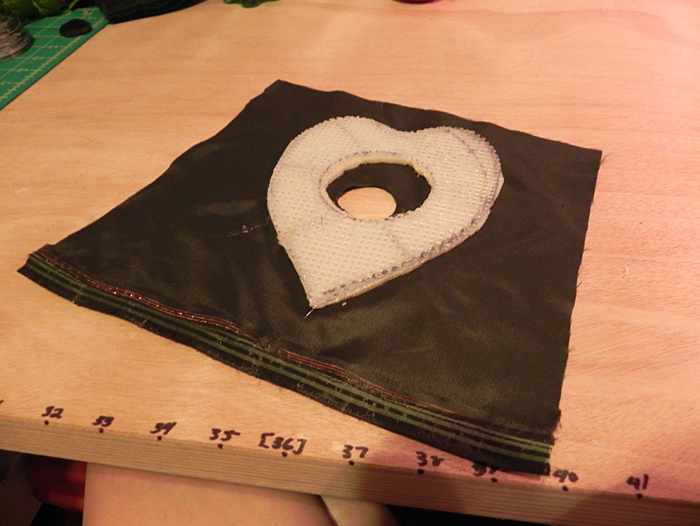
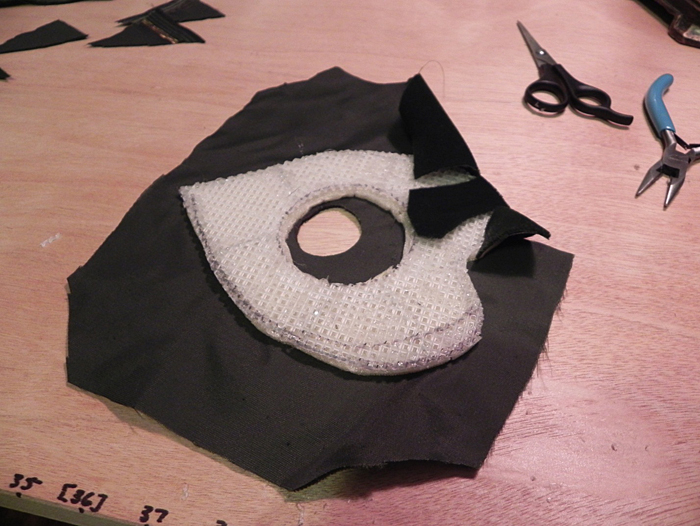
 Step 15
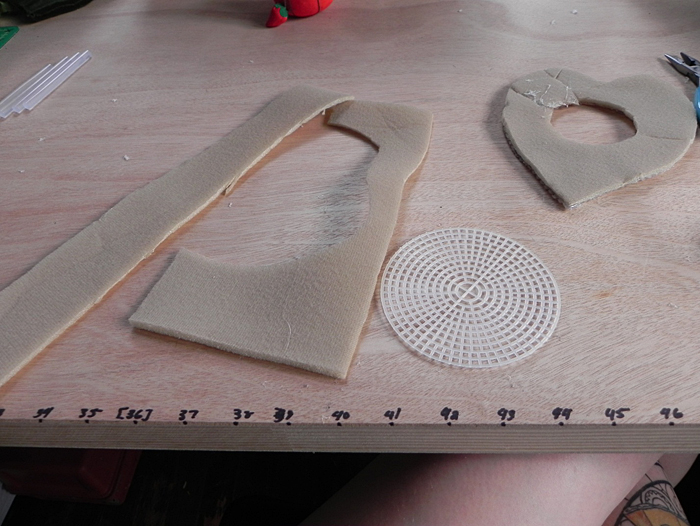
 �Trim off all the excess from the foam around the brim and also cut out the hole in the center. (I used scraps for my foam topper, but if you are using your fresh 1 yard then yours will look much prettier!)
 Step 16
 � Do the same thing for the top of the hat that we put aside before. The only difference is that it doesn�t matter which side you glue it on since the top doesn�t need any wire support. Again, trim off all excess around the edges.
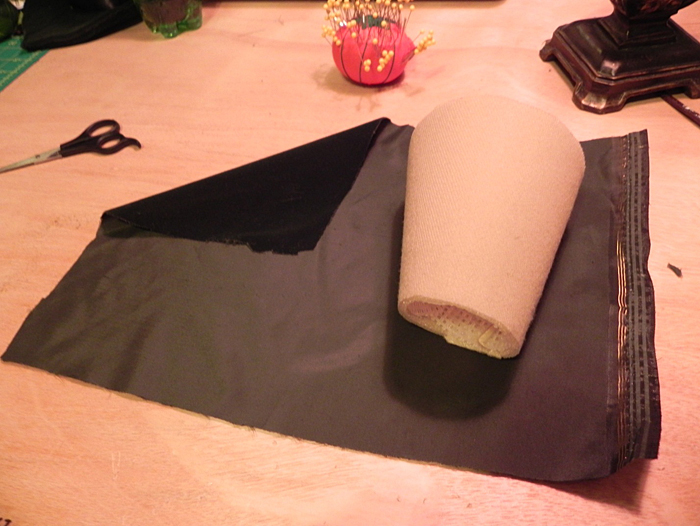
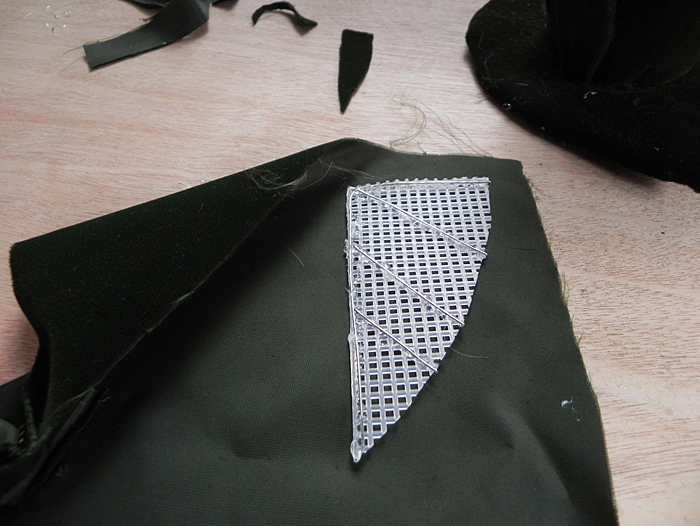
 Step 17
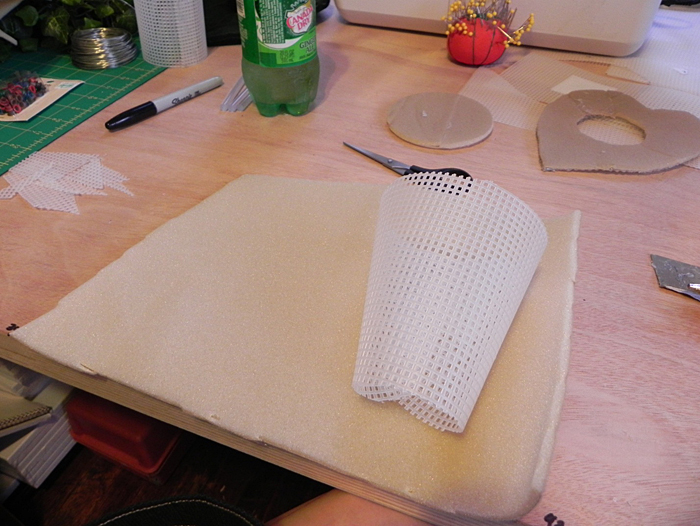
 � Create the middle section of your hat. This part can be pretty tricky due to the form going from skinny at the bottom to slightly larger at the top. I did this by rolling and trimming one of my plastic grids. Roll it horizontally until it�s skinny on one end and wide on the other. You want the skinny end to be a tiny bit smaller than the circle we cut into the base. The wide end should be about the same width of the top we made. Glue the ends of the roll together until it is sturdy and trim off the excess.
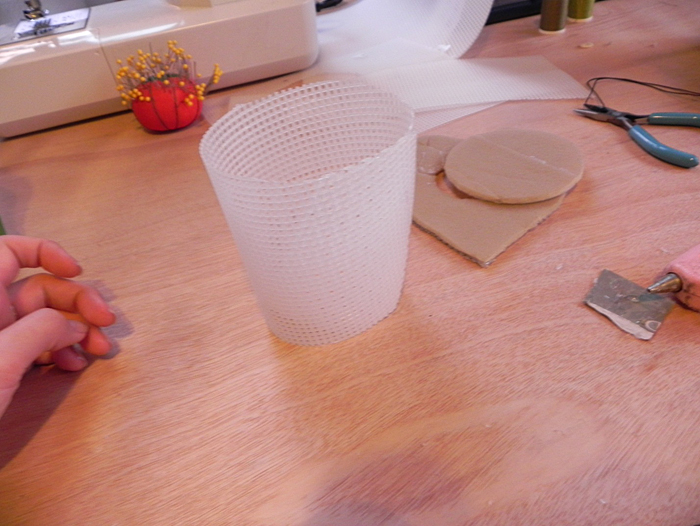
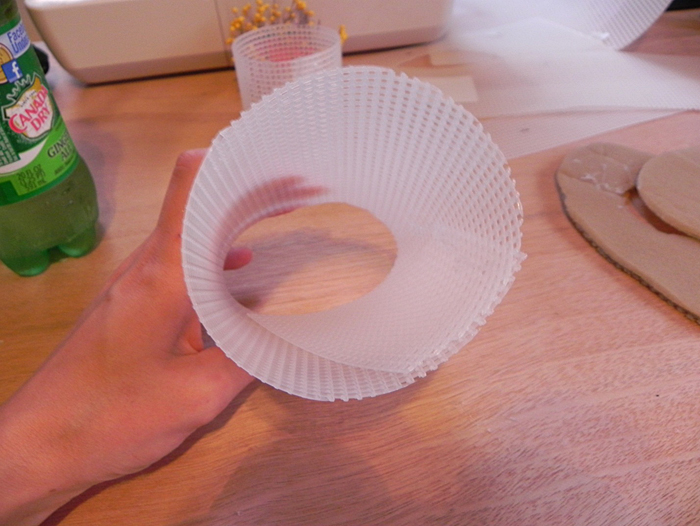 Step 18
 � Make sure your middle piece is flat and proportionate to the rest of your hat. Trim down the top and bottom of your mid form until it can sit flat on the table and can support the top of the hat flush and flatly on the wider end.
 Step 19
 � Cover the middle section in foam. This step is super easy and quick! Glue foam onto the form as you did for the other two structure pieces. If you look at the bottom of my form you will see a tiny triangle of grid missing where I cut too deep; luckily the foam will cover small errors like this when I trim the excess.
 Step 20
 � Check your sizing! Place the middle piece into the base to make sure it fits snug. This will be key to the base stability of your hat.
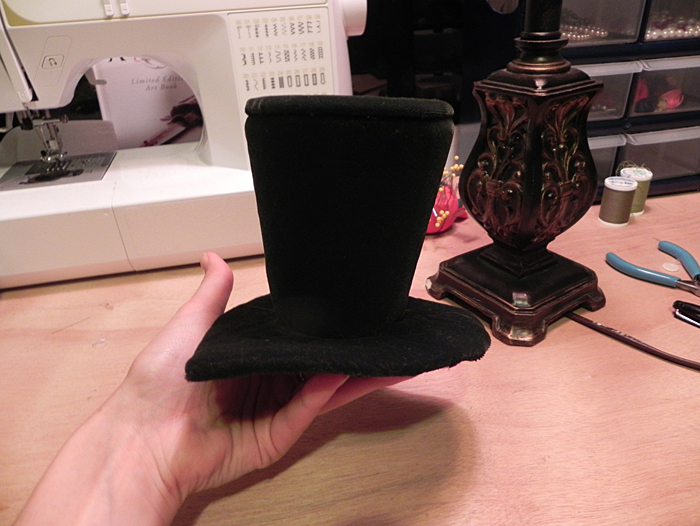
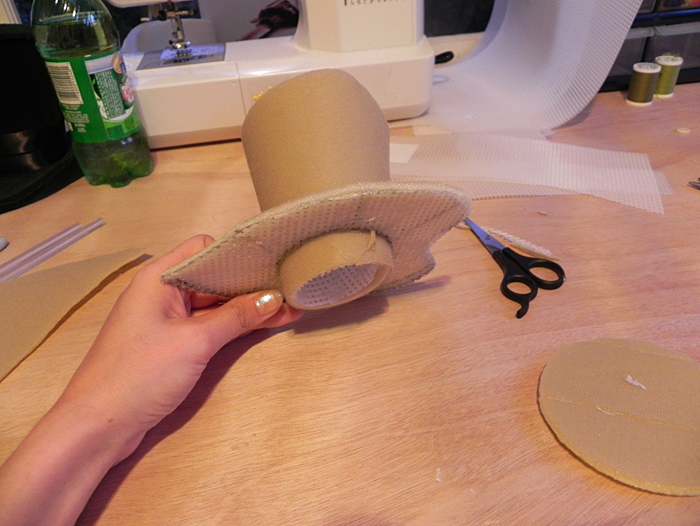 Step 21
 �Check your work! So far we have created 3 proportionate pieces for our hat! Looking good so far!
 Step 22
 � Trace a small circle on the wrong side (the not amazingly soft side) of the velvet. This circle should be a little bit smaller than the actual circle cut into the base itself.
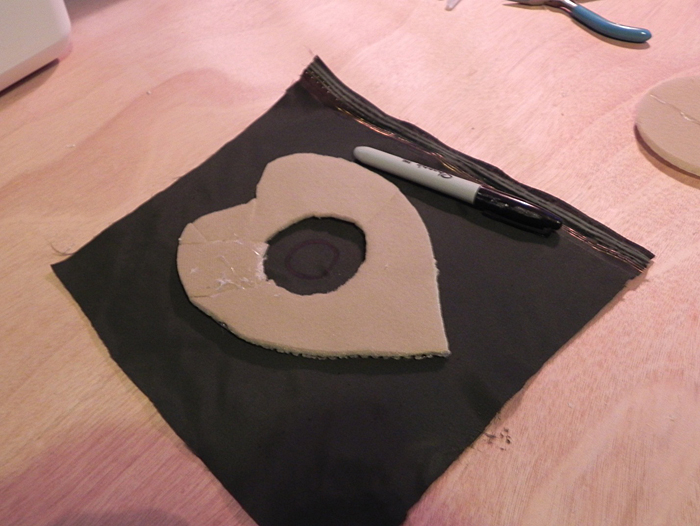 Step 23
 � Cut out the circle traced onto the velvet. Now we can begin securing the velvet onto the form! Glue the wrong side of the velvet to the plush side of the base while trying to keep the circle right in the center.
 Step 24
 � Check your work! This is what the other side of your form will look like. You can see I glued a little off center, but we can make that work! Make sure all your edges are securely glued to the form.
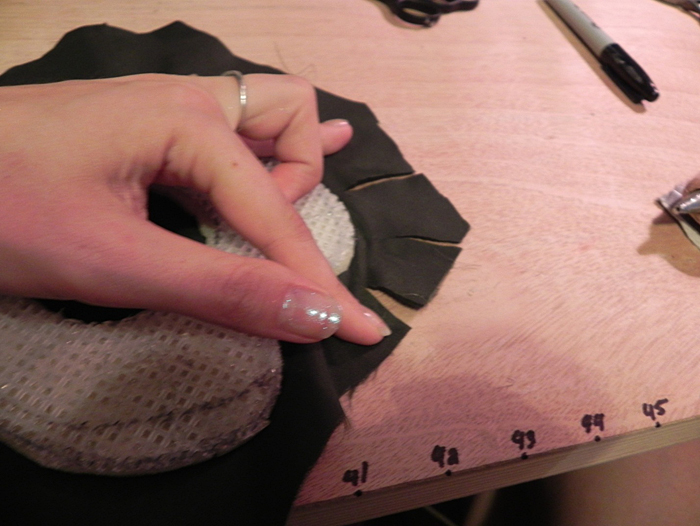
 Step 25
 � Trim a little bit of the excess off, but keep about �� around the form. It is VERY difficult to glue around perfect circles without creating �wrinkles� in the fabric. We can fix that! Cut your velvet into little sections leaving just a smidge of room between the form and the end of the cut. If you cut all the way to the form the white grid will show through and ruin the smooth appearance of the hat.
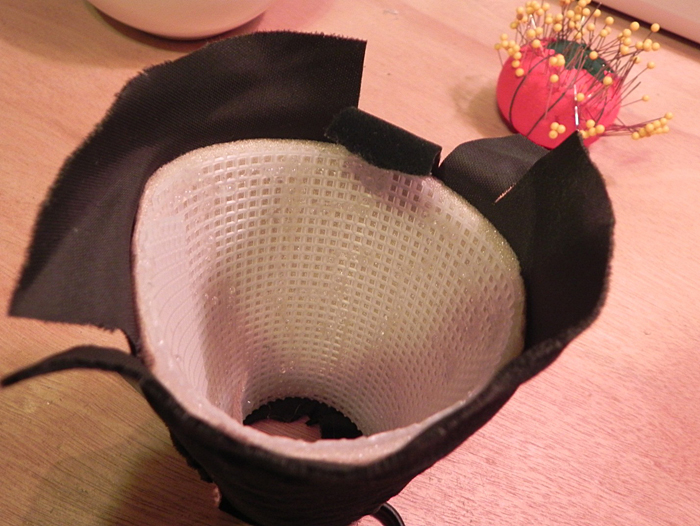
 Step 26
 � Begin gluing the little sections of fabric onto the form. Pull each piece tight across the form so it will be smooth when you hot glue it down to the grid.
 Step 27
 � The pieces you glue will overlap, which is completely fine! Remember, making sure you pull them tightly as you go from piece to piece will give the hat a much more smoother appearance. Continue this process until the entire base is covered. You go through the same process for the inner circle as you did from the outer trim. Cut off excess velvet and set it aside.
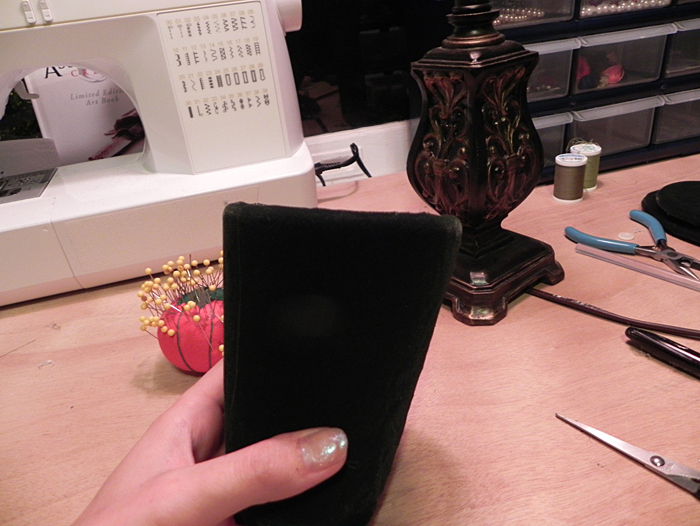
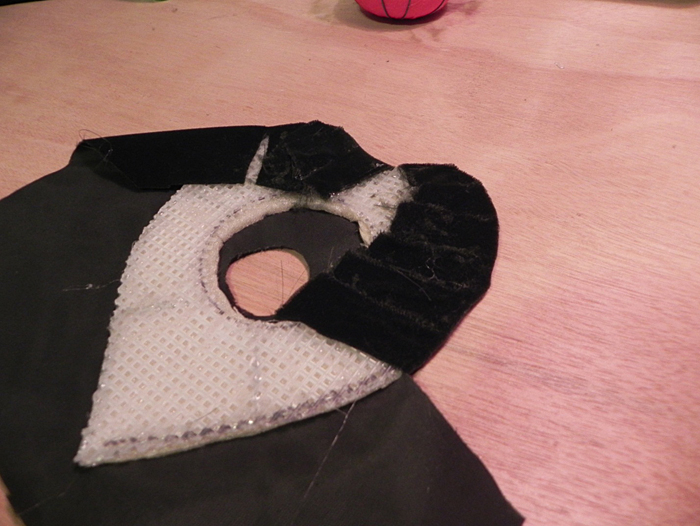 Step 28
 � Check your work! This is the top of the base form. I still need to trim a little in the middle so it doesn�t show through but the outside has no wrinkles from gluing the fabric and it looks like we are ready to move on!
 Step 29
 � Glue the circle topper onto the wrong side of a piece of the velvet. This process will be almost identical to what you did for the base.
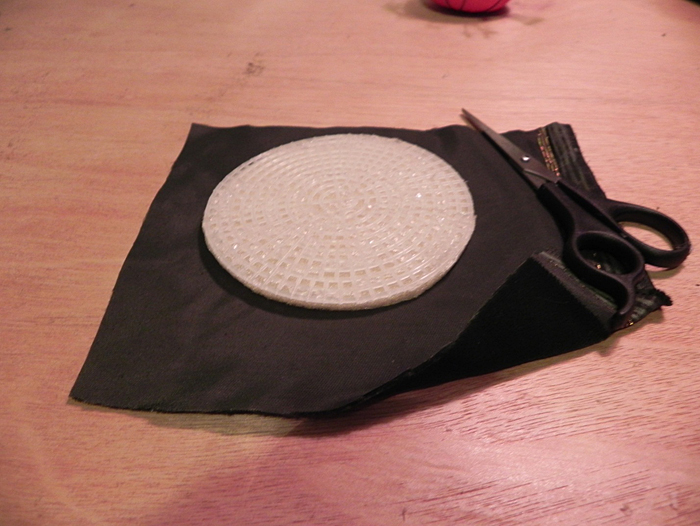 Step 30
 � Remember to cut the small sections into the fabric to prevent a wrinkling effect. Again trim off the excess that�s just building up in the middle.
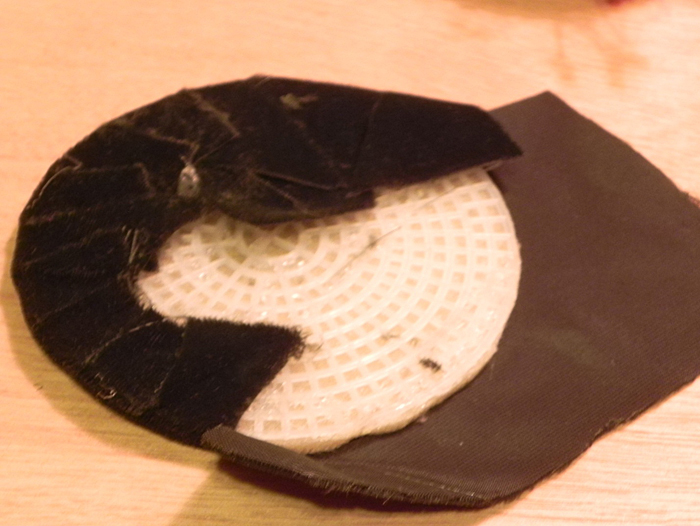 Step 31
 � Check your work! Tah dah!!! A beautiful circle with no wrinkles! Your topper is all dolled up and ready to go!
 Step 32
 � Glue the velvet onto the middle section. This process (again) is almost identical to the other two pieces. Put the wrong side of the fabric against the form and glue fabric into place.
 Step 33
 � Cut fabric into little sections on the top and the bottom. Remember to pull fabric tight before gluing.
 Step 34
 � Again, it�s ok for the pieces to overlap! Trim excess fabric so that only a little bit remains on the inside of the piece.
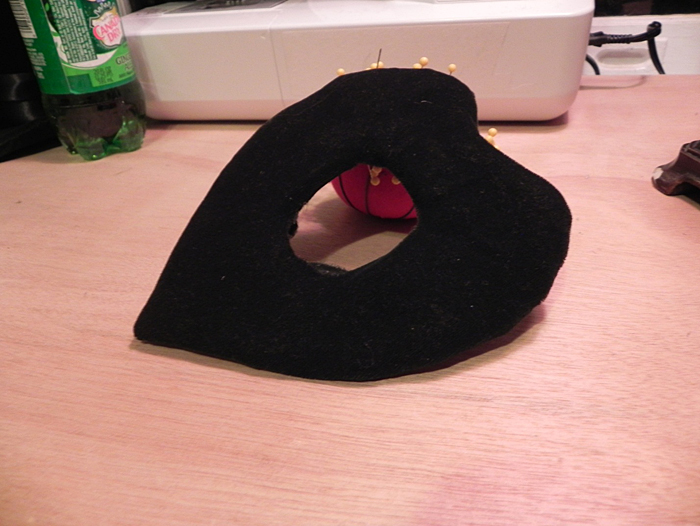
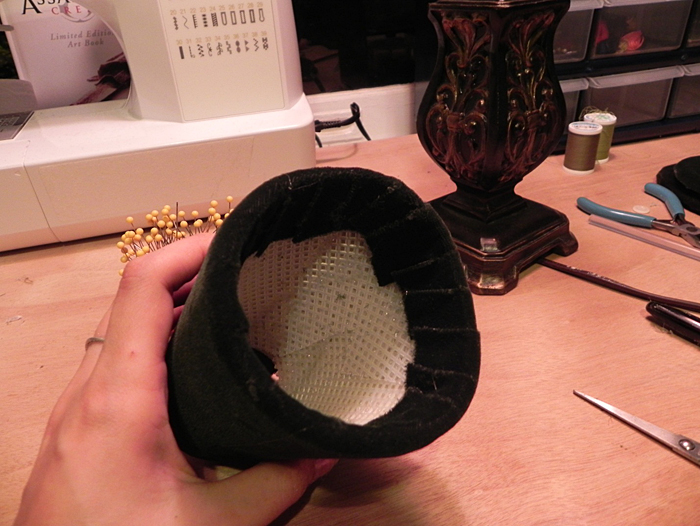 Step 35
 �Check your work! YAY! Again no wrinkles! There is a seam down the back of the form from the beginning and end of the fabric. This is fine, it will be the back of the hat!
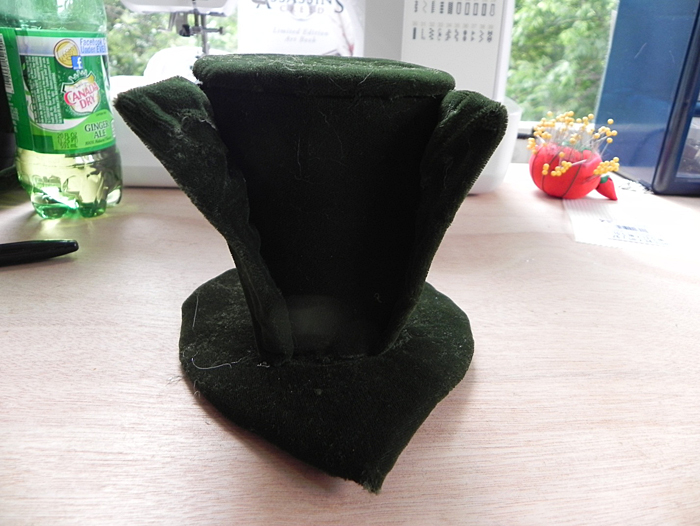
 Step 36
 � Assemble your hat! Insert the middle piece into the base and put the top in place. Once you are confident that all the pieces are securely in place and where you want them to be, glue them into place! (There will be a small bit of the middle sticking out of underside of the base of the hat. Simply trim excess off and you�re good to go.)
 Step 37
 � Create �wings� for the lacing in the hat. Grab scraps of your plastic grids and trim them equally down to a small wing shape. They should be as tall as the middle form, going from the base to the top. Here�s how the wings look in the end:
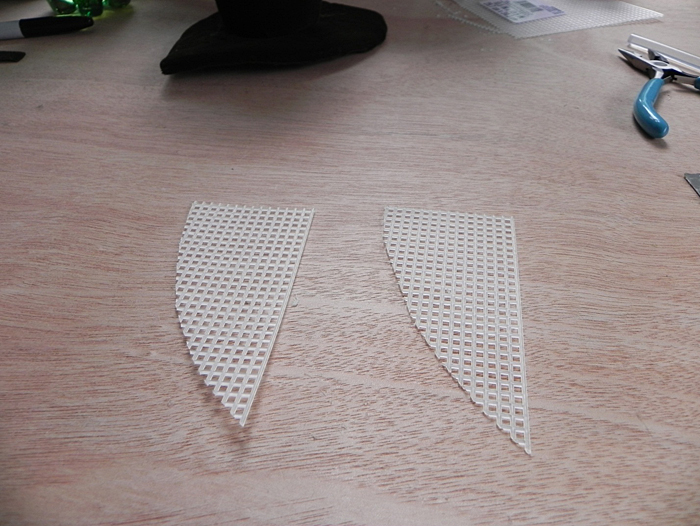 Step 38
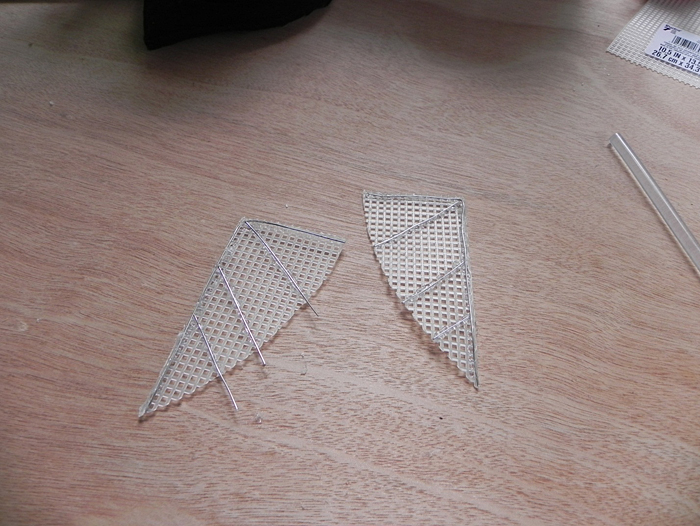
 � Glue wire frames and supports onto your wings. This will give you the ability to bend and form them any way you like. Again, trim off any excess wire to prevent cuts in the fabric.
 Step 39
 � Cover your wings in velvet. Use the same process we used for all the other pieces to prevent wrinkling.
 Step 40
 � Place wings in front of the hat. They should be able to fit snug between the middle and the base. Once you have fiddled with the position and are comfortable with where they stand, glue the wings into place. When the glue dries you can even bend the tips outward to give the hat an �opening� feel.
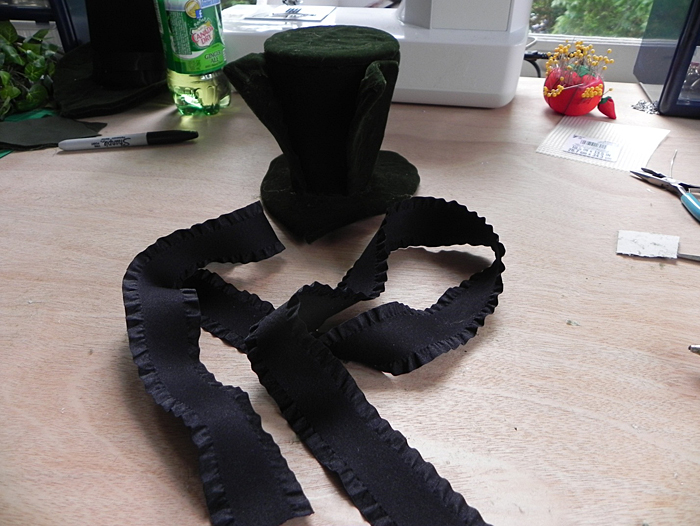
 Step 41
 � Place ribbon against the base of the hat. I chose a pretty frilly ribbon, but just about any thick black ribbon will do.
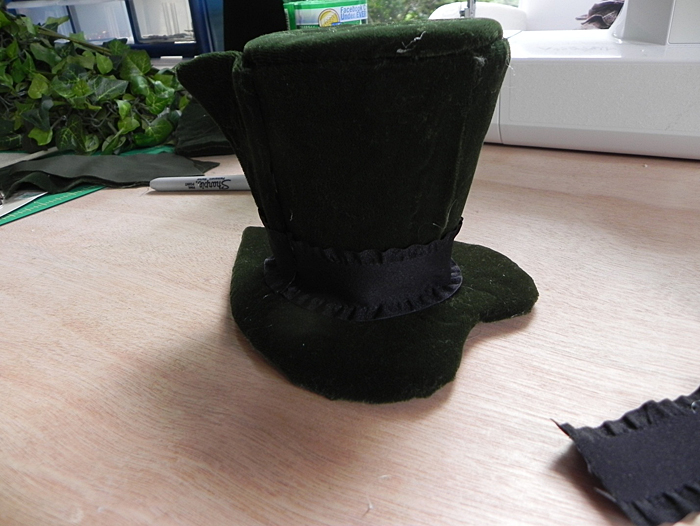
 Step 42
 � Check your work! Make sure the ribbon is firmly glued into place and all excess is trimmed off. The ends of the ribbon can be reinforced with a tiny dab of hot glue if you are worried about them fraying.
 Step 43
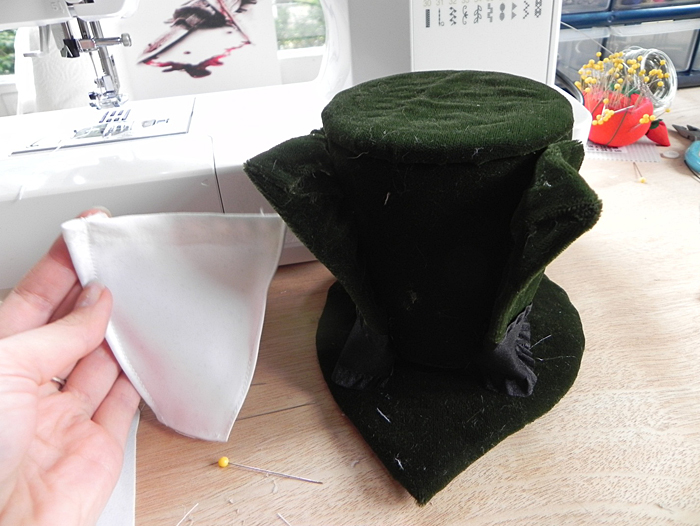
 � Create the white midsection of your hat. Take your white fabric and measure it against the inside of the wings you placed on your hat. The fabric should reach from the top to the base and go completely from wing to wing. Pin and sew your fabric, making sure to fold over the edges, creating a type of binding to keep the fabric from fraying.
 Step 44
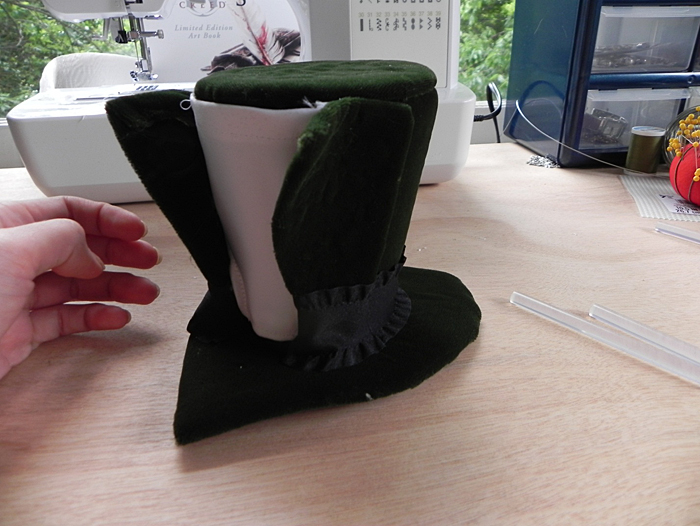
 � Place the white fabric into your hat. Take a few minutes and really adjust your fabric to be exactly where you want it. Once you are sure it is where you want and you have trimmed off all excess strings, you can glue your fabric to the middle of the hat. Make sure you secure the corners and tuck them into the wings.
 Step 45
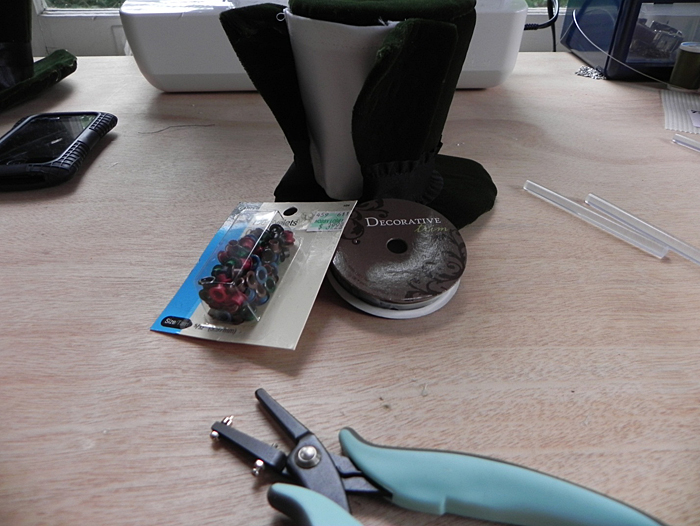
 � Add lacing holes up your wings! If you have weak arms like myself, you may want to use a leather hold puncher. They make bigger holes easier than the craft one that I�m currently using.
 Step 46
 � Begin lacing! Couldn�t get those holes punched just right? No worries! I created a set of wings just for that. Make sure you punch at least the top two holes so that the laces can hang through. Now cut tiny pieces of the cord and you can actually glue them to appear laced! (The picture below is not actually laced; it�s glued to look the part.) Sometimes the hole punching and reinforcing can be very trying and frustrating, so you can always go this route to save time (and stress!).
 Ending Steps!
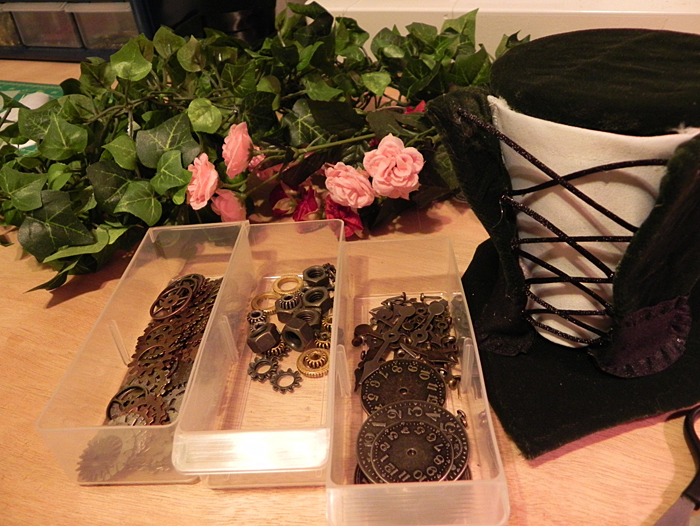
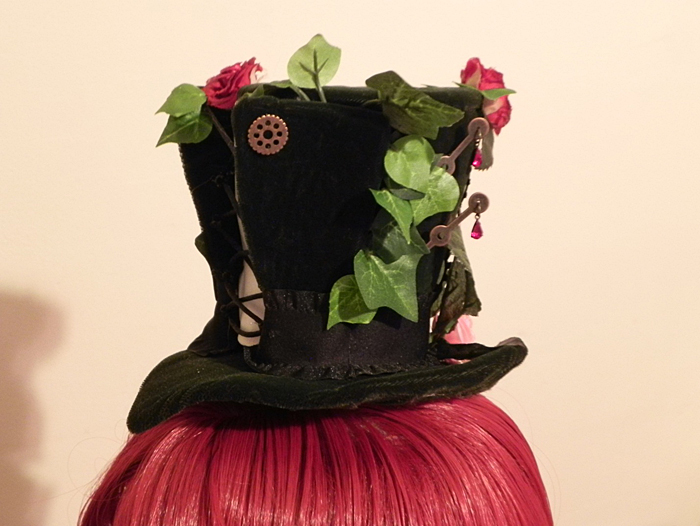
 � Now finally my favorite part� DECORATING!!! Currently you can still see some seams in your little hat made of love, but no worries � decorating is here to save the day! I used roses, the leaves from the roses, the ivy garland, clockwork pieces and gems I had in my craft room. You can use whatever you like to suit your personal tastes! You can use just about any hair accessory to get this hat to stay in your wig. Some would use headbands, others would use clips or bobby pins�it�s totally up to you!
Here are some photos of my completed hat. It took an estimated 5 or 6 hours to complete. I had no previous plans drawn out and just kind of dived into this project McGuyver style! Yes, I messed up plenty of times (and burnt my hand) but that�s all part of the process. So please don�t get discouraged if you accidentally put something in the wrong spot or glue something upside down. Remember, you can use just the base instructions and then create anything you want! It doesn�t have to be steampunk � it can be Gothic Lolita or a cute Easter Bunny mini hat for some other cosplay. Keep in mind it�s all about practice and tapping into your creative side!

I plan to have more discount cosplay blogs coming your way soon! I hope you enjoyed this tutorial and if you have any questions please let me know!
-Geek Girl
Jillian Ryan -
facebook -
tumblr
Artist:
NoFlutter
Professional photos:
Eurobeat Kasumi Photography &
EleventhPhotograph
Follow us on:
January 04 2014